Setting Up Your Ace Account
Updated July 3, 2026
This guide takes you from zero to a working Follow Up Ace account in about 10–15 minutes. It's for the Follow Up Boss account admin, broker, or owner who purchased Follow Up Ace ��� standard agents don't use it; they're activated by their admin.
Before you start
- You need admin, broker, or owner access in Follow Up Boss — standard agents can't complete this setup.
- Have your billing information ready.
- Open followupace.com/admin and app.followupboss.com in separate tabs.
Step 1 — Create your account
- Go to followupace.com/admin/signup.
- Enter your email and create a password, or sign in with Google.
- Accept the Terms of Service.
Step 2 — Verify your email
- Open the verification email from Follow Up Ace.
- Click the verification link — you're taken to the next step automatically.
Signing in with Google skips this step; your email is already verified.
Step 3 — Connect Follow Up Boss
This is the most important step. Ace uses OAuth to read your contacts, activity, and deals from Follow Up Boss — without it, the assistant has no data to work with.
- Click Connect Follow Up Boss on the setup screen.
- Sign in with your Follow Up Boss admin credentials when redirected.
- Review the permissions and click Allow.
- You're returned to Follow Up Ace automatically.
Step 4 — Select your plan
Choose one or more products; you can change this later.
- Ace — AI chat embedded in Follow Up Boss. $25/seat/month.
- Ace Pro — adds voice mode and Claude & ChatGPT integration. $55/seat/month.
- Ace Trove — the account-wide intelligence add-on: full-book win-probability and churn scoring, GCI-at-risk in your own dollars, Command Center, Team Cockpit, and Seller Radar. A flat monthly price tiered by contact-database size ($49–$899/mo).
If you select Ace Trove, your tier is auto-quoted from your Follow Up Boss contact count — there's nothing to size by hand. Select at least one plan to continue, or click Skip for now to proceed with free, limited access.
Step 5 — Billing
- Enter the number of seats for each plan you selected.
- Enter your payment details.
- Review your total and click Subscribe.
If you clicked Skip in Step 4, you won't see a billing screen — you can add a plan any time from the dashboard.
Step 6 — Configure your account
Set your brand identity and assistant preferences before your team goes live.
- Enter your team name and any business context (market, specialties, team style).
- Set the assistant's tone and writing style.
- Review your Knowledge Base — Ace builds an initial one automatically from your Follow Up Boss data.
- Click Enable Ace to activate the assistant for your account.
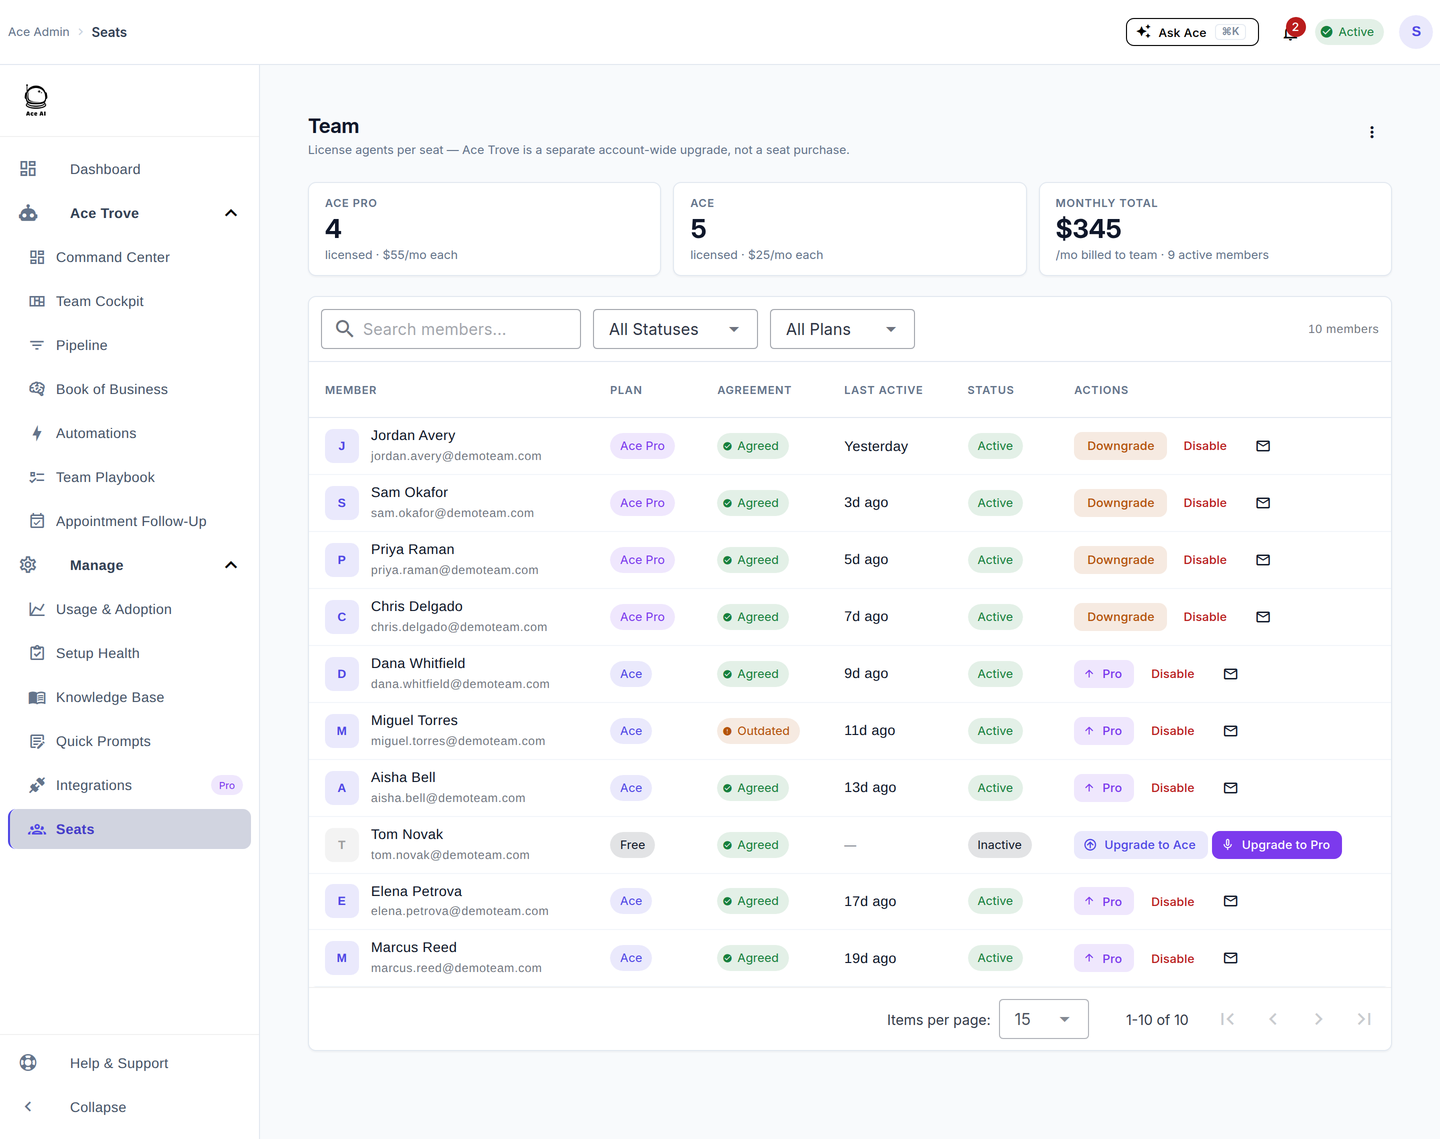
After setup — add your team
- Go to Seats in the left sidebar.
- Turn on the toggle for each agent you want to activate, and assign a plan (Ace or Ace Pro).
- Send each one a welcome email — agents don't enter any payment information.
Optional — set up MCP (Ace Pro)
MCP connects Ace to Claude, ChatGPT, or other AI clients for workflows outside Follow Up Boss.
- Go to Integrations in the left sidebar.
- Copy your Remote MCP Server URL.
- Add it in Claude, ChatGPT, or your preferred client.
Full walkthrough: Connect FollowUpAce to Claude, ChatGPT & Other AI Assistants via MCP.
Related articles
- Getting Started with Follow Up Ace — Admin Complete Guide
- Billing & Seat Management: Complete Guide
- Team Startup Guide: Rolling Out Follow Up Ace to Your Team
Last updated: July 2026
Thanks for the feedback — it helps us improve.